


In the realm of Final Fantasy XIV, the Everkeep (Extreme) trial stands as a formidable challenge, testing the mettle of even the most seasoned adventurers. This comprehensive guide aims to equip players with the knowledge and strategies necessary to conquer this epic encounter, unlocking the path to coveted rewards and bragging rights.
If you’re seeking a seamless and affordable way to conquer the Everkeep (Extreme) trial, consider enlisting the services of GladiatorBoost. Their prompt and transparent FFXIV boosting services can elevate your gaming experience, ensuring a hassle-free journey to victory.
Table of Contents
Eligibility and Prerequisites
Before embarking on this daunting quest, adventurers must meet specific prerequisites. To unlock the Everkeep (Extreme) trial, players must reach the esteemed level of 100 and complete the pivotal main scenario quest, “Dawntrail.” Additionally, they must engage in dialogue with the enigmatic Wandering Minstrel, found in the breathtaking region of Tuliyollal.
While the trial requires a minimum item level of 690 to queue, this barrier can be circumvented by entering with a full, well-coordinated party. Ensure that your comrades are equally prepared for the challenges that lie ahead.
Preparing for Battle: Party Composition and Roles
Effective party coordination is paramount in conquering the Everkeep (Extreme) trial. Begin by meticulously assigning each DPS (Damage Per Second) player a dedicated support partner, pairing tanks with melee DPS and healers with ranged DPS. This strategic allocation of roles ensures a harmonious synergy within your party.
Furthermore, each player should be assigned a specific square near their clock position, though with sixteen squares and eight players, this arrangement need not be overly rigid. This positioning system will prove invaluable as you navigate the intricate mechanics of the encounter.
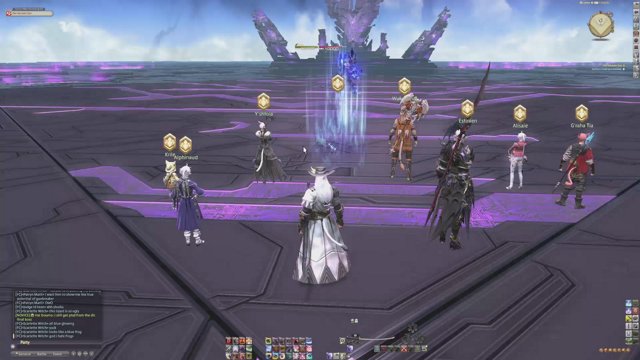
Phase One: Confronting Zoraal Ja
The initial phase of the trial pits your party against the formidable Zoraal Ja in the standard arena. While the arena’s walls do not instantly inflict lethal damage, they imbue players with a persistent bleed debuff, gradually sapping their vitality.
After Zoraal Ja unleashes the devastating “Dawn of an Age” ability, the arena undergoes a dramatic transformation. The once-familiar platform shifts into a central square surrounded by four identical platforms. From this point onward, players risk plummeting from the arena’s edges, heightening the stakes of the encounter.
Zoraal Ja’s Arsenal of Abilities
Throughout this phase, Zoraal Ja wields an array of formidable abilities, each demanding precise execution and strategic maneuvering from your party. Brace yourselves for the following onslaught:
Half Full: Zoraal Ja unleashes a cleaving attack, targeting the half of the arena where his sword emanates a radiant glow.
Actualize: A moderate raid-wide magical damage assault, testing your party’s resilience.
Multidirectional Divide: Spawning ominous X-shaped line AoEs on the ground, these harbingers of destruction will erupt into vast line AoEs, demanding swift evasion.
Backward Half: A cleaving strike that engulfs the entire arena, save for the back quadrant where Zoraal Ja’s sword remains unlit.
Forward Half: Mirroring its counterpart, this ability cleaves the arena, sparing only the front quadrant where Zoraal Ja’s sword glows.
Regicidal Rage: Two tethers manifest, latching onto random players. These tethers must be swiftly claimed by the tanks, as they unleash devastating AoE damage upon detonation.
Dawn of an Age: A cataclysmic raid-wide assault that alters the arena’s layout, signaling the transition to the next phase.
Vollok: Summoning swords upon the surrounding platforms, these ominous blades unleash AoE strikes upon the squares they occupy.
Sync: Forging connections between the swords on the surrounding platforms and the central blade, this ability links them with ominous blue lines.
Greater Gateway: Spawning lines that interconnect the platforms, this ability enables swords to traverse these conduits, unleashing their wrath upon the main platform in patterns mirroring their summonings.
Blade Warp: Conjuring forth swords that deliver line AoE strikes upon the surrounding platforms.
Forged Track: Commanding the summoned swords to advance along the platforms, shifting rows or columns as they interact with the lines spawned by Greater Gateway.
Chasm of Vollok: Bestowing all players with an ominous yellow marker, this ability rains down sword AoEs upon the squares they occupy after a brief delay, inflicting a magic vulnerability up debuff.
As the encounter commences, Zoraal Ja initiates the assault with “Actualize,” a raid-wide strike. Swiftly regroup at the arena’s center as he unleashes “Multidirectional Divide,” spawning perilous line AoEs that demand evasion. Immediately assess the subsequent mechanic, either “Backward Half” or “Forward Half.”
If “Backward Half” manifests, position yourselves behind Zoraal Ja, favoring the side where his sword remains unlit. Conversely, should “Forward Half” emerge, seek refuge at the front, occupying the side where his sword radiates its ominous glow. Simultaneously, navigate the lingering line AoEs from “Multidirectional Divide,” identifying safe pockets amidst the interwoven patterns.
Brace for the repetition of “Multidirectional Divide,” this time accompanied by “Regicidal Rage.” Rally behind Zoraal Ja, enabling the tanks to swiftly claim the tethers. Mitigate the tethers’ impact and seek sanctuary from the line AoEs, with tanks distancing themselves from the party and each other. Fortify your defenses and heal through the devastating “Dawn of an Age” as the arena transitions.
Zoraal Ja will summon forth swords with “Vollok,” followed by “Sync,” linking platforms to the central stage. Identify safe squares on the connected platforms, devoid of sword strikes. Brace for “Half Full,” cleaving half the arena, and position yourselves on the unscathed side of the cleave, avoiding connected platforms.
“Greater Gateway” will then spawn, accompanied by “Blade Warp” and “Forged Track.” Two swords will manifest on platforms linked by blue lines, while a solitary blade will appear on the platform bearing red and green conduits. Evade the swords traversing the blue lines, then assess whether the remaining blade advances through a red or green line.
Red lines expand the AoE, leaving two safe havens on the platform. Green lines, however, repel players from the line’s path, necessitating knockback immunity. Swiftly disperse to your assigned squares as “Chasm of Vollok” rains down, mitigating the onslaught before “Actualize” restores the arena to its original state.
Phase Two: Zoraal Ja’s Renewed Onslaught
In the second phase, Zoraal Ja unveils a fresh arsenal of abilities, escalating the intensity of the encounter.
Zoraal Ja’s New Abilities
Projection of Triumph: Sixteen sword icons materialize upon the ground, heralding the arrival of two rows of donut markers and prey markers that traverse the arena. Upon reaching the sword icons, these markers detonate in devastating donut AoEs and circle AoEs, respectively.
Projection of Turmoil: Afflicting all players with the Projection debuff, this ability summons a row of stack markers that advance from north to south. When a debuffed player intersects this line, a stack explosion erupts, dealing moderate magic damage and inflicting a magic vulnerability debuff.
Bitter Whirlwind: A formidable AoE magical tank buster, this ability strikes the main tank thrice, inflicting magic vulnerability with each blow. The offtank must swap roles for the second hit, while the main tank reclaims their position for the third. Alternatively, a single tank may choose to invoke invulnerability for all three strikes.
Drum of Vollok: Targeting two players, this mechanic demands a stack, with non-targeted players receiving a knockback in the direction they stand relative to the targeted player, dealing heavy magical damage.
Aero III: Summoning tornados upon both platforms, this ability launches players skyward, transporting them to the opposite platform while inflicting a wind resistance down debuff.
Duty’s Edge: A multi-hit stack marker that strikes four times, each blow more devastating than the last, culminating in massive magic damage.
Burning Chains: Forging fiery tethers that bind supports to DPS, this ability demands players run away from their tethered counterpart to sever the link.
Phase Two Strategy: Overcoming the Onslaught
The phase commences with “Projection of Triumph,” a mechanic that demands precise visualization and execution. Two rows of donut markers and prey markers will traverse the arena, detonating upon contact with the sword icons. Players must evade these AoEs while maneuvering adroitly.
After the second row of markers resolves, Zoraal Ja will initiate either “Backward Half” or “Forward Half.” Dodge the marker AoEs while positioning yourselves for the cleave, then swiftly reposition within the cleave’s safe quadrant. Immediately thereafter, evade the next set of marker AoEs as Zoraal Ja casts “Actualize.” If multiple players succumb, mitigate this raid-wide assault to prevent further casualties.
Next, brace for “Projection of Turmoil.” Players must shed their Projection debuffs one by one as the line advances across the arena. Stack northward, with a single player venturing into the moving line while the party remains nearby. After the party’s vulnerability expires, the next player will enter the line, with the entire group shifting southward to prevent the line from encroaching upon them. Once this mechanic concludes, the tank will face “Bitter Whirlwind,” necessitating mitigation and role swapping or invulnerability.
Regroup at the arena’s center and mitigate “Dawn of an Age,” signaling the transition to separate platforms. “Drum of Vollok” will be cast, and the non-targeted role must position themselves to receive a knockback to the newly spawned northwest or northeast platform.
Zoraal Ja will then summon “Vollok,” manifesting a large sword on each platform, followed by “Sync” and “Chasm of Vollok.” With the swords occupying four squares each, and two swords present, eight squares remain for players. Position the melee combatants on the platforms closest to Zoraal Ja, with ranged players behind them, ensuring no identical square occupancy relative to the other platform.
“Aero III” will then spawn tornados at the platforms’ rear. As Zoraal Ja casts either “Backward Half” or “Forward Half,” position yourselves behind the line, as the cleave will strike the front row of squares and the side he slashes. Players on the opposite platform must step into the tornado to rejoin the correct platform. Stack and mitigate “Duty’s Edge.”
Zoraal Ja will then cast “Burning Chains.” The role that did not move with the tornado must now utilize it to reach the opposite platform. All players must run away from each other to sever the tethers. Reconvene near the center and heal through “Actualize,” which restores the arena to its original state.
Phase Three: The Final Confrontation
In the climactic phase, Zoraal Ja reprises familiar mechanics with a newfound intensity.
Zoraal Ja’s Final Ability
Half Circuit: A variation of “Half Full,” this ability cleaves the arena with additional blades. If the blades manifest within Zoraal Ja’s hitbox, they will detonate in a point-blank AoE. However, if they spawn outside, they will unleash devastating donut AoEs.
Phase Three Strategy: Persevering to Victory
Zoraal Ja initiates the phase with “Projection of Triumph,” now intertwined with the perils of “Half Circuit.” Evade the third explosion, then swiftly reposition for the cleave, dodging the fourth explosion in the process. Once the markers resolve, “Regicidal Rage” will manifest, prompting the tanks to claim the tethers, mitigate their impact, and distance themselves from the party and each other.
“Projection of Turmoil” will follow, accompanied by three iterations of “Half Full” – two in the arena’s center and one at the southern edge. Navigate the swords while managing the Projection debuff stacks. Alternatively, you may opt to strategically evade the cleaves while distancing yourselves from the line. “Bitter Whirlwind” will then strike, necessitating role swapping or invulnerability.
Brace for “Dawn of an Age,” reverting the arena to its phase one configuration. “Vollok” and “Sync” will manifest, followed by “Chasm of Vollok.” Evade the swords and reposition to your assigned squares, mitigating the onslaught of “Duty’s Edge.”
The final segment mirrors the initial phase. The arena returns to its original state with “Actualize,” followed by a concluding “Multidirectional Divide” into “Backward Half” or “Forward Half” combination. Zoraal Ja will then enter an enraged state, unleashing a devastating “Actualize” capable of annihilating your party.
Triumph or perish – the choice is yours. Muster your resolve and slay Zoraal Ja before his wrath consumes you!
Party Finder Strategies and Rewards
Upon vanquishing Zoraal Ja, the treasure coffer will yield four random Resilient accessories. Additionally, there is a chance for the coveted “Resilient Armor” and “Faded Copy of Seeking Purpose” to manifest. For the luckiest of adventurers, the rare mount, “Wings of Resolve,” may grace their collections.
Furthermore, all party members will receive one “Resilient Totem,” with five such totems exchangeable for any Resilient accessory of their choosing.
By meticulously following the strategies outlined in this comprehensive guide, you’ll be well-equipped to confront the challenges of the Everkeep (Extreme) trial head-on. Embrace the thrill of the encounter, hone your skills, and emerge victorious, etching your name among the ranks of Final Fantasy XIV’s most accomplished adventurers.
Related Guides

Unlock Every Free Weapon & Runner Shell Skin in Marathon (Complete Guide)
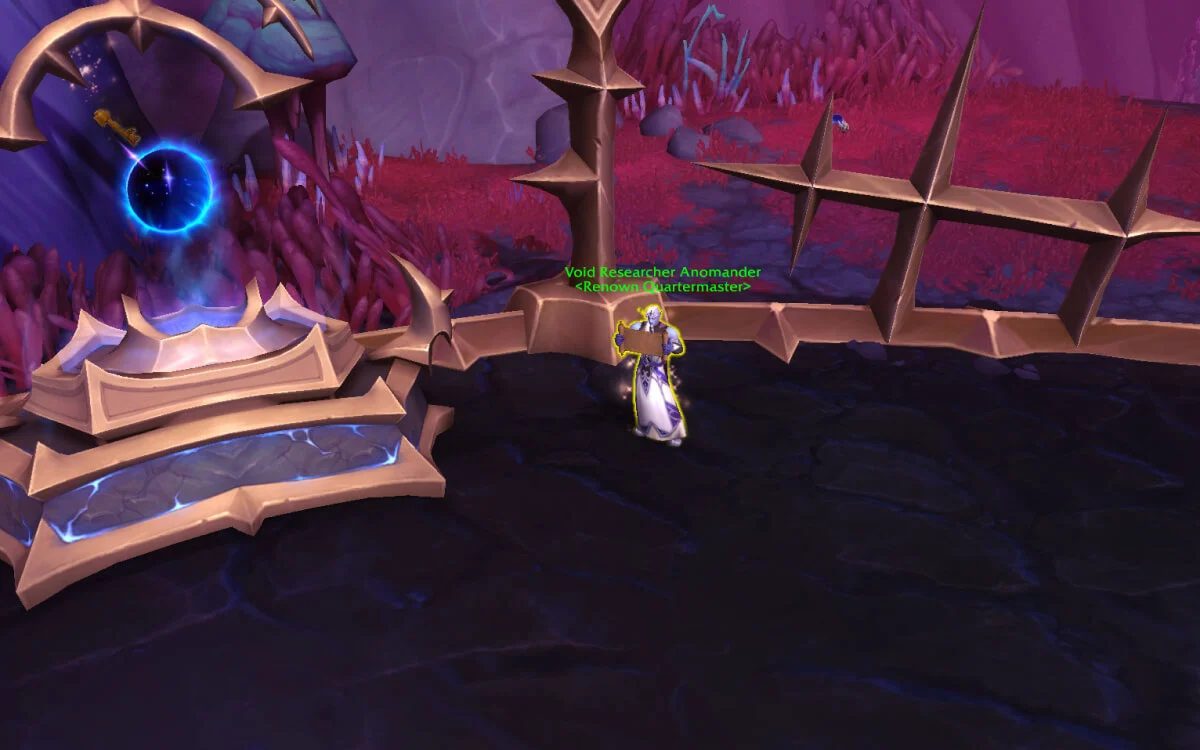
Where to Find the Singularity Renown Quartermaster in WoW Midnight
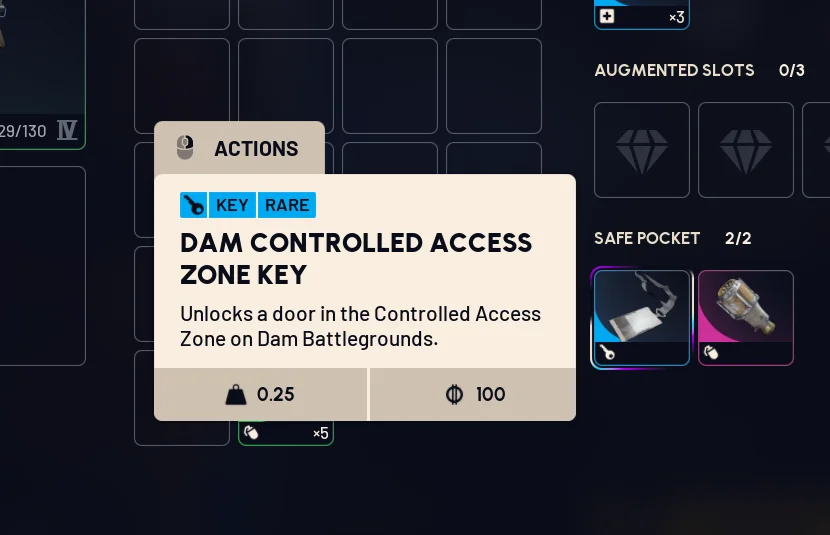
ARC Raiders Dam Controlled Access Zone Key: Where to Find & Use It
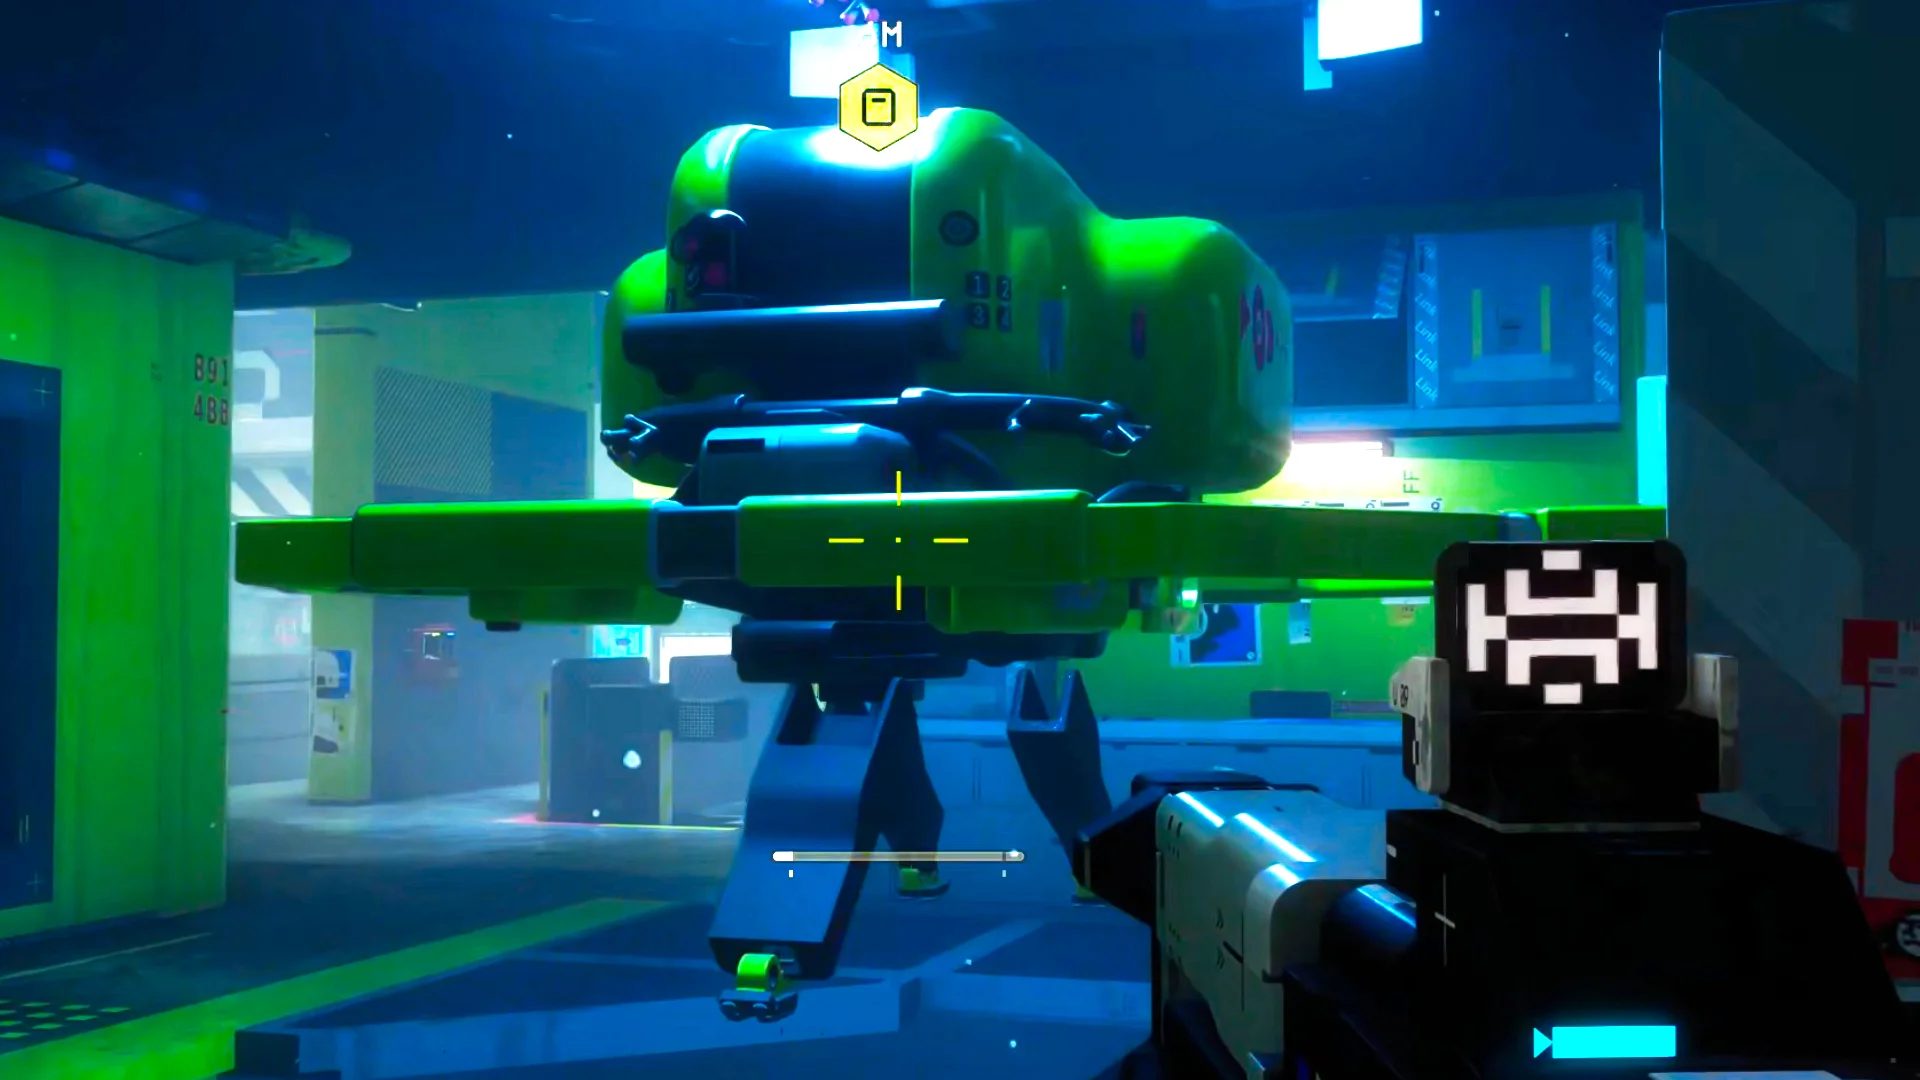
Marathon Equitable Distribution Contract Guide: All Steps Explained